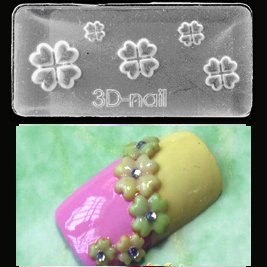
3D Nail Art Molds allows techs to easily apply three-dimensional acrylic nail art. The molds have pre-cut designs for techs to fill inwith acrylic. The acrylic hardens quickly into smooth and detailed three-dimensional designs, which are then placed onto the nails.
Instruction on how to use the 3D Nail Art Mold
1. Clean the Mold and fill the mold with liquid acrylic using desired color. Allow to dry for at least one minute.
2. Remove acrylic from the mold. You can use tweezers to apply the design to the nail. Or you can apply the design directly to the nail from the mold when it's ready. (At this time, you should've already applied the nail polish color of your choice.)
3. Apply a small dab of clear polish to the nail to adhere the 3D acrylic. Nail glue can be used instead if preferred. Repeat steps until desired design is reached.
5. Finish off with a clear top coat. Voila - you're done!
For more information, you can email me at [
[email protected]].